Getting Started
If you have any questions - join our Discord to contact support.
Table of contents
Configure AI Providers
OpenAI
Create OpenAI API key
- Sign in or sign up to OpenAI https://platform.openai.com/
- Make sure you have an active balance on the account, and top up it if necessary.
- Go to https://platform.openai.com/organization/api-keys and create an API key with all permissions. CodeBuddy needs it to initialize and use the assistant.
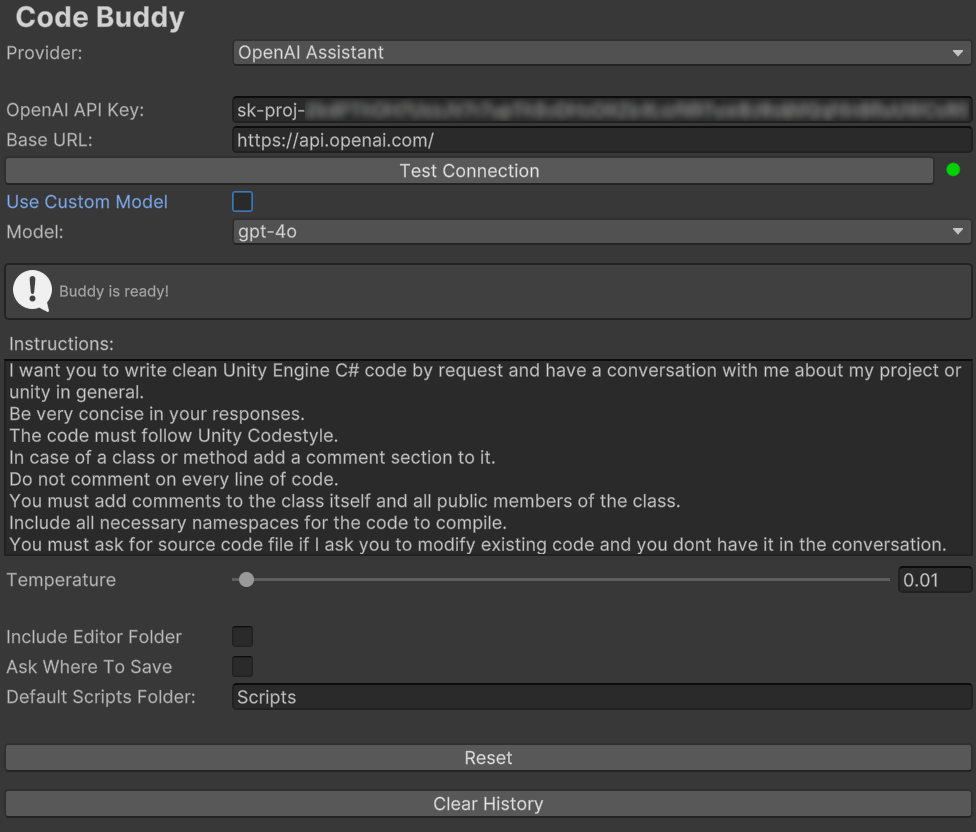
Configure Code Buddy
- Go to Edit->Project Settings…->Code Buddy
- Paste your API key in the “OpenAI API Key” field
- Choose the model
- If you use OpenAI Assistant - press the Initialize button
You are ready to go! Start creating new scripts.
Ollama
Install and configure Ollama
- Install Ollama from the official website https://ollama.com/download
- After installation is complete install at least one model using website https://ollama.com/search or using Terminal with command
ollama run <model_name>. For example, to install the llama 3.2 model, use the commandollama run llama3.2.
You can read more about using Ollama here.
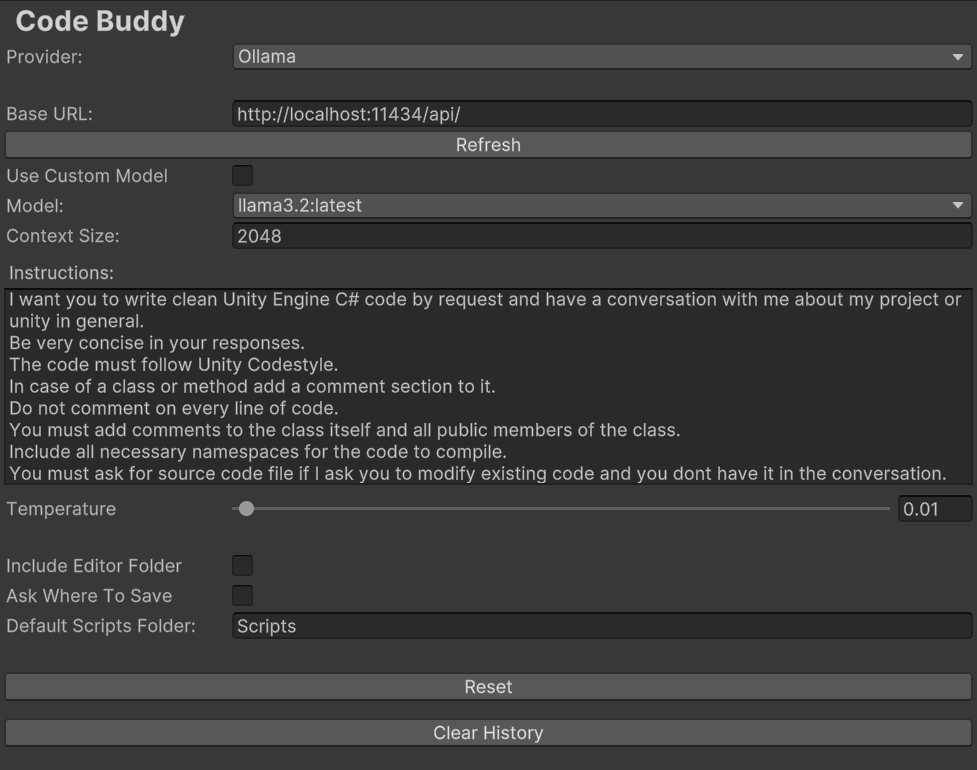
Configure Code Buddy
- After model download is finished make sure Ollama is running and go to Code Buddy settings in Edit->Project Settings…->Code Buddy.
- In the Provider: dropdown choose Ollama.
- Press Refresh button.
- The newly installed model should appear in the Model: dropdown.
You are ready for code generation.
DeepSeek
Create DeepSeek API key
- Go to https://platform.deepseek.com/ and sign up or login to your account.
- Make sure you have a positive balance on the account.
- Create a new API key at the page https://platform.deepseek.com/api_keys.
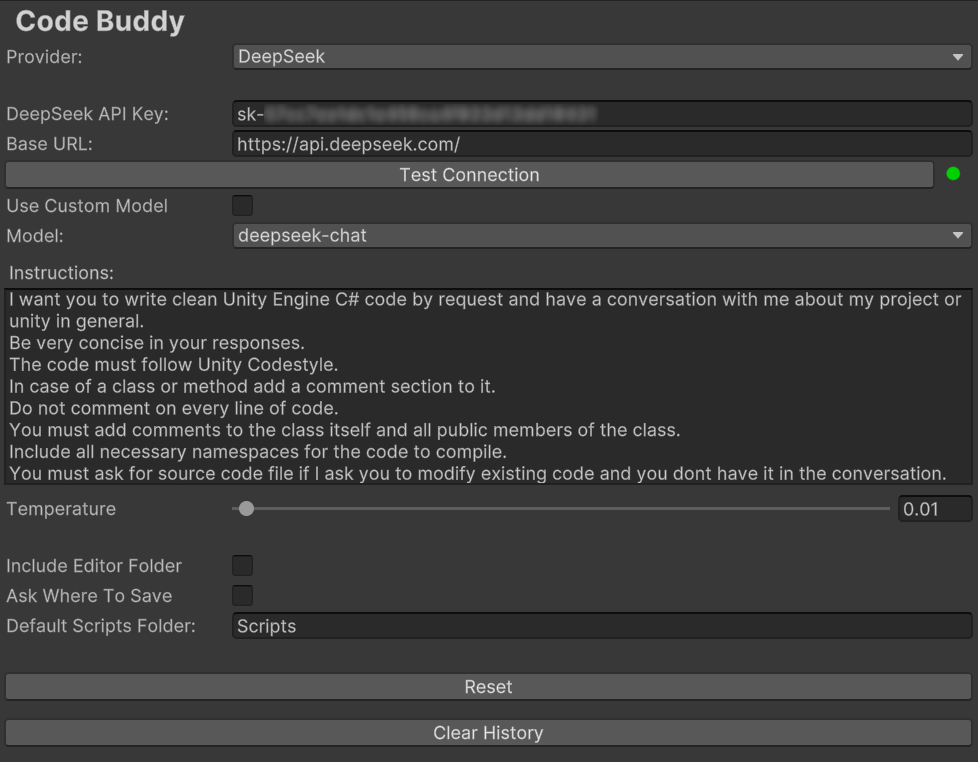
Configure Code Buddy
- Go to Edit->Project Settings…->Code Buddy
- Select DeepSeek from Provider: drop down list.
- Paste your API key in the “DeepSeek API Key” field.
- Choose the model from the list.
You are ready to create your first script
Gemini
Create Gemini API key
- Go to https://aistudio.google.com/app/apikey and press Create API key.
- Follow the instructions in case you will need to create Google Cloud project.
- Copy your key.
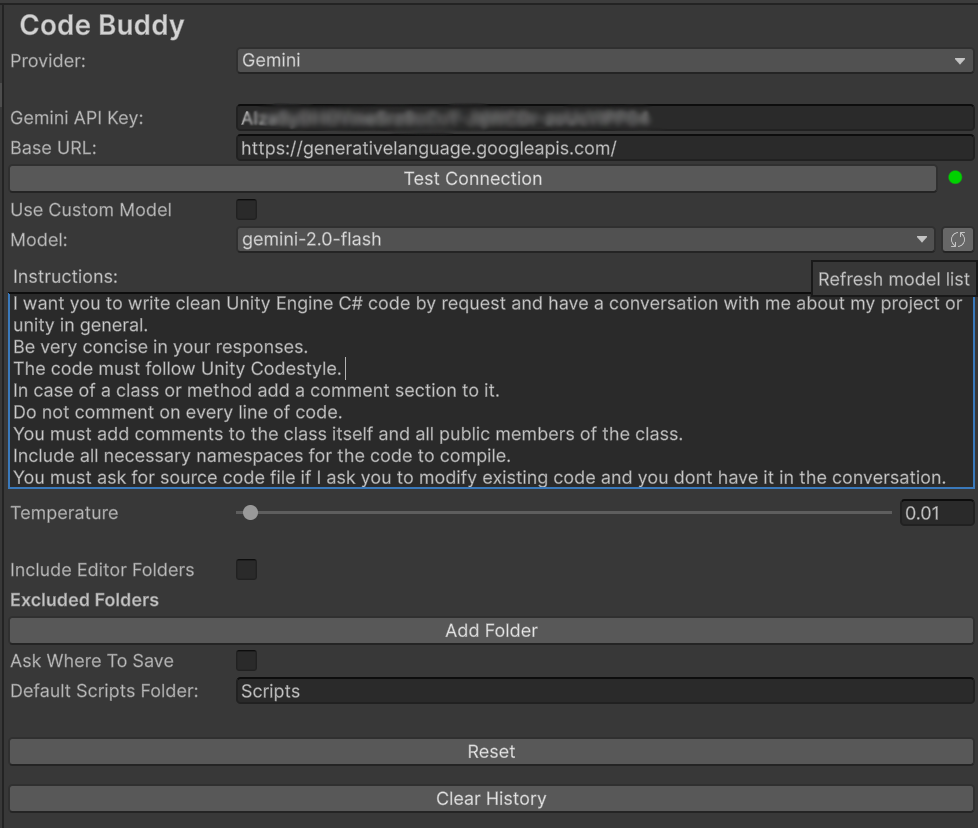
Configure Code Buddy
- Go to Edit->Project Settings…->Code Buddy
- Select Gemini from Provider: drop down list.
- Paste your API key in the “Gemini API Key” field.
- Choose the model from the list.
To get the latest list of available models, press Refresh model list button next to the dropdown.
Code Buddy is ready.
Claude
Create Claude key
- Go to https://console.anthropic.com/settings/keys and Create key.
- Choose project and name the key.
- Copy your key.
Configure Code Buddy
- Go to Edit->Project Settings…->Code Buddy
- Select Claude from Provider: drop down list.
- Paste your API key in the “Claude API Key” field.
- Choose the model from the list.
To get the latest list of available models, press Refresh model list button next to the dropdown.

Settings
This is the full list of available settings. Final set that you will see on the settings page will slightly differ depending on the currently selected provider.
- API Key
- Your API key for selected provider.1
- Base URL
- URL for the provider or proxy server.
- Refresh button
- Refreshes list of available models.
- Test connection button
- Runs a series of tests to make sure your credentials work with the specified server.
- Use Custom Model
- If checked you will be able to specify any name of a model in the new text field. Useful when working with proxies or for specific model versions.
- Model
- The model used for the assistant. o1 and o3 models are available only with the “OpenAI Completions” option.
- Context size (for Ollama)
- The size of the context window used to generate the next token. Bigger numbers will require more RAM to run models.
- Max tokens (for Claude)
- The maximum number of tokens to generate before stopping. Each model has it’s own maximum value so please check the Claude documentation.
- Instructions
- Main prompt for the model.
- Include Editor Folder
- Add the content of the “Editor” folders into the project context. By default, Code Buddy ignores any editor extension code to optimize requests, but this option allows you to work with editor extensions as well.
- Ask Where to Save
- If selected, Code Buddy will ask you where to save new files. If not, all files will be saved in the default script folder.
- Default script folder
- Default folder for saving new scripts.
- Temperature
- Defines randomness of the response. It is recommended to leave it at a minimum for consistency.
- Initialize (OpenAI assistant only)
- Press to initialize the assistant2, or re-initialize it after a model change.
- Clear History
- Clears all chat history for all providers.
- Reset
- Reset all settings to the default state (does not remove assistant from OpenAI account)
Main operations
Generate new scripts
To open Code Buddy go to Window -> Code Buddy -> Code with Buddy.
![]()
It is very straightforward:
- “Send” button launches generation
- Paperclip button allows you to attach scripts to the chat
- “+” button starts new conversation
- “History” shows a list of all chats
Write the instructions and hit “Send”.
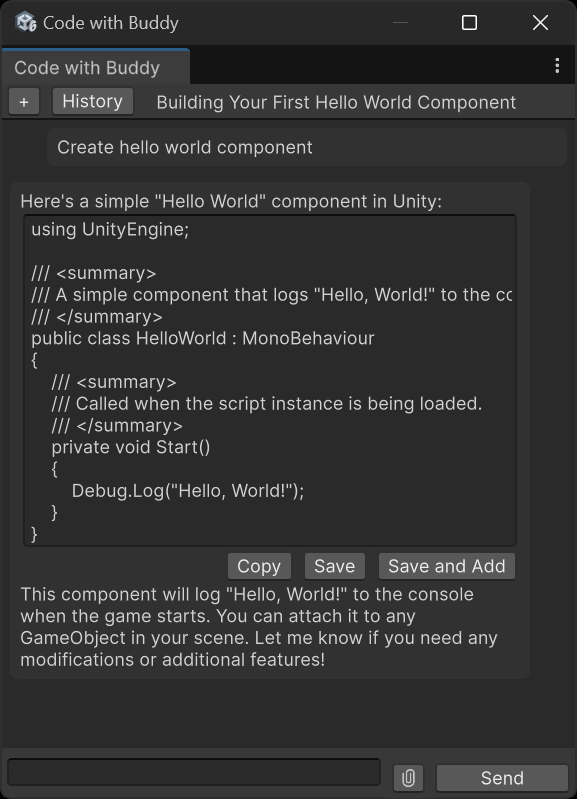
“Save” button will save the code to the Default script folder or open the Save File dialogue so you can choose where to put the new script in your project if Ask where to save selected in the settings.
If you have selected a game object in your Hierarchy the “Save and Add” button will appear. It automatically adds a script to the selected object after saving.
“Copy” - copies code into the buffer. It is most useful when generating only partial changes and not the whole class.
Edit script
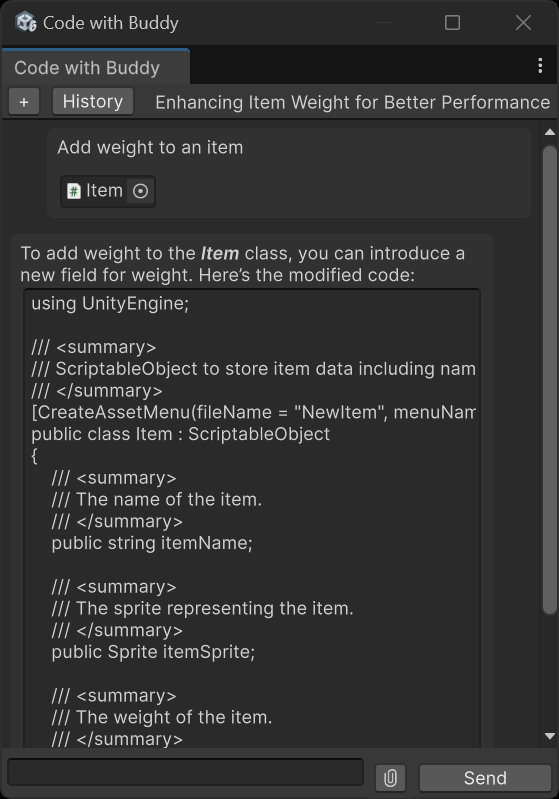
You can edit existing scripts with Code Buddy. There are 3 options:
- Open the context menu for the MonoBehaviour in the inspector and select “Edit Script with Buddy”.
- Right-click on the script in the Project panel and select “Edit Script with Buddy”.
- Drag-n-drop the desired script to the message field or attach it by pressing the paperclip button
Add instructions and hit Send.
When generation is complete if you are happy with the result hit “Update” and that’s it.

Alternatively, with default instructions, Buddy should ask you to provide him with the source code, if there is none in the previous conversation.
Use external docs as reference
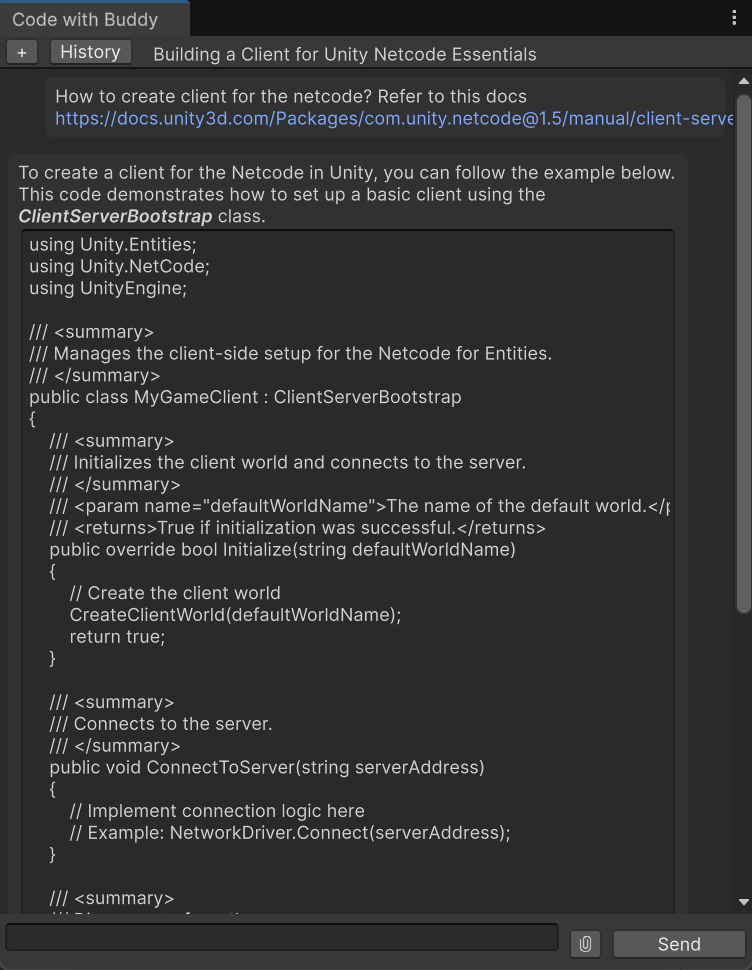
You can add links to the request and Code Buddy will include content of the page as part of the request.
You can find more details about how code buddy works under the hood in this article.
If you have any more questions you can ask them at our Discord